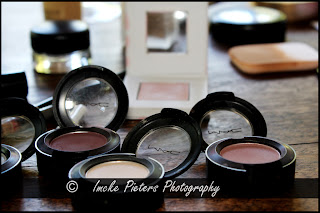
I've recently done a shoot where we've made us of Revlon's Photo Ready foundation (WHAT AN AMAZING PRODUCT!!) and some of MAC's eye shadow. These are two wonderful products to use for your wedding should you be doing your make-up yourself! You can't go wrong by using them!!!
OK, enough marketing of products! What are important to remember with regards to you hair and make-up on the day of the wedding. Well, here I go, again! A list of things compiled over the years to ensure that one more aspect of your wedding runs smoothly.
Make-up hints / tips / advise... call it whatever you want, it comes down to the same thing in the end, PERFECT MAKE-UP :-)
- IF it is in your means - make use of a professional make-up artist for your wedding. It is a bit more pricy than doing it yourself, but it will save you a lot of stress!! BUT!!! please here me out on this point!
Do a test-run with them prior to the wedding. A good make-up artist shouldn't take 2 hours to complete your make-up. Trust me, you don't want them in your face OR space that long. It will work on your nerves! (I have a number of a wonderful lady should you require one!)
- Let the make-up artist come to your house / where you are getting dressed.
This
will save time and keep the stress levels low.This will save you the worries of being on time for the appointment and from being stuck in traffic. This also makes for wonderful pre-wedding ceremony photos where you are getting ready for your big day.
Should you have to go to the make-up artist and hairdresser, allow enough time between the two appointments so you don’t have to rush! This will keep your stress levels down!
- If you can't afford a make-up artist, do not fret!! The following tip is for you!!
Not everybody can afford a make-up artist, don't fret! Here is what you can do. Go to a make-up store and ask the people to apply your make-up for you. ASK them what they are doing and HOW they are doing it.
Buy your make-up from them and practice to apply it as they did. Your make-up will be perfect on your wedding day. JUST REMEMBER!!! to tell the ladies if it is an evening wedding!! (See tip below)
- Amount of make-up used & colors used
Ladies, please please please!! apply the make-up a bit darker than usual. It comes out better on your photographs and especially for an eventing / late afternoon wedding it is of utmost importance to do so. If you put your make-up on with to soft a hand, you will look like a sheet on your wedding photographs!
Should you like black and white photographs, consider doing your make-up in shades of brown. It shows up more on a black and white image than the other colors do.

- Preventing "Hotspots" or commonly known as the hated SHINY AREAS!
You hate them, we as photographers hate them and no one else SEES them, or let it bothers them. Hotspots usually occurs on the tip of the nose, chin and fore head. To prevent them follow the following steps and it is like magic and the nasty shiny spots are gone!
Make use of the Photo Ready foundation (as previously mentioned in this blog) and let one of your brides maids (or even the photographer) carry a small container (film canisters use to work brilliantly for this!) with a make-up sponge with a little bit of foundation on it in their purse. Now you can just "touch up" your make-up before the couple shoot and the magic is done!

- Sensual lips
Ladies, make use of lip line before applying your lipstick and gloss. For some unknown reason (to me) your lipstick stays on longer! Let your bridesmaid (or the photographer if they don't mind) carry your lip gloss and lipstick for you.
Glossy lips are always a winner on a photograph!
- Rosy Cheeks
Apply a bit of blusher to your cheeks to enhance them and to complete the picture. ... If it's not something that you use every day, practice before hand to ensure that you apply it just right!

GLITTER BLUNDERS!!! THIS IS A BIG NO-NO-NOOOOOOOOO!!!!!!!!!!!!!!!!!!
One of the biggest mistakes a bride can do is wearing glitter in her hair or sprayed all over her arms, neck and chest. PLEASE PLEASE PLEASE!!!!!!!!!!!!!! DO NOT do this!! If you really have to, do it just before entering the reception.
Why may you ask, since it looks nice and gives you that little bit of extra shine on your wedding day. Well, here are my top three reasons:
- It looks like dust spots on the photographs.
- The photographer will not be able to edit it out reslulting in
- the bride being extremely ANGRY because of the dust marks / spots on her photographs.
- Be yourself!
If you are not someone that usually wears make-up, go for the natural look. Remember, you will feel more comfortable and happy with the end results if you still look like you after all the make-up and dressing up is completed!


